
With highly automated lift and shift solution CloudEndure continually replicates your source machines into a staging area in your AWS account without any downtime or impacting the performance.
Benefits of CloudEndure
- Replication of many machines in parallel as part of large-scale migration projects
- Non-disruptive replication and testing so business operations continue as usual.
- Support for any source infrastructure and all applications running on supported operating systems, including databases and other write-intensive workloads
- Highly automated orchestration minimizes project length and IT skills needed.
- Physical machines, including both on-premises and co-location data centers
- Virtual machines from any hypervisor, including VMware, Microsoft Hyper-V, and others
- Replication is also supported between Regions or Availability Zones in AWS
Migration Steps
Steps need to be performed on CloudEndure portal
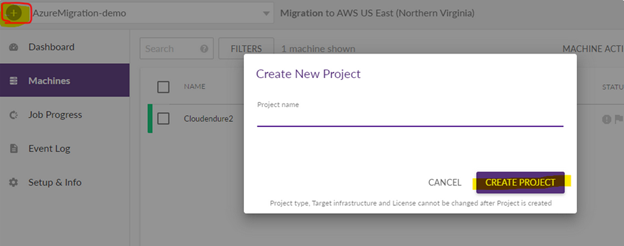
- Login to CloudEndure portal at https://console.cloudendure.com/ and create a new Migration project by clicking on the “+” button in the upper left side > Give project name > Click “Create Project”
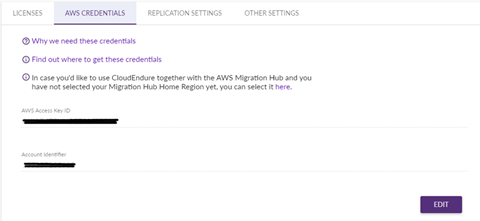
2. Go to Setup & Info > AWS Credentials
-
- Create IAM using in the destination AWS account with the Permissions mentioned in this page
- Paste the AWS access key ID and Secret Key ID in this page and click SAVE
3. Go to Replication Settings
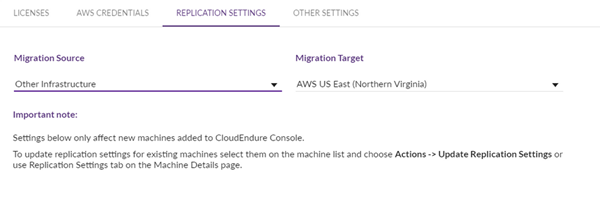
a. Migration source:- Select “Other infrastructure” if the source server is outside AWS
b. Migration Target:- Select the destination AWS region
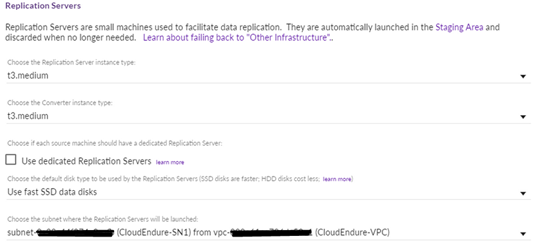
c. Replication Servers:- Choose the following details for replication servers
-
-
-
- Instance type for replication and converter servers
- Disk type, available options are Fast SSD disk, ordinary disks.
- The subnet where replication servers will be launched
- Security Groups to apply to the Replication Servers
- Option to enable VPN connection to the source server
- Enable/Disable disk encryption
- Setup Tags for replication servers (Name Tag is reserved and can’t be used)
- Enable/Disable Network Bandwidth Throttling
-
-
d. Click “Save”
4. Go to “Machines” tab in LHS
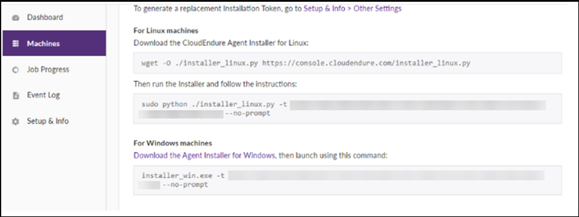
5. Copy the URL to download CloudEndure agent and the command to install the agent.
Steps need to be performed in Source Server
Windows
- Connect to Source server using RDP
- Open any web-browser and paste the URL to download CloudEndure agent
- Save the installation file and open CMD prompt in the same location and execute the command to install the agent
- The agent will check the number of disks attached and the total GB of data to be migrated and install the CloudEndure Service
- Exit from RDP connection
Linux
- Connect to Source server using SSH
- Copy the line that includes the download the installer to the source server terminal and execute the command in “run the installer” section to install the agent.
- The agent will check the number of disks attached and the total GB of data to be migrated and install the CloudEndure Service
- Exit from SSH session
Steps need to be performed on CloudEndure portal
- Once the CloudEndure agent installation is completed in the source machine, the source machine will be shown in CloudEndure portal’s Machines section.
- Then replication server is created in the AWS account and starts the initial data replication.
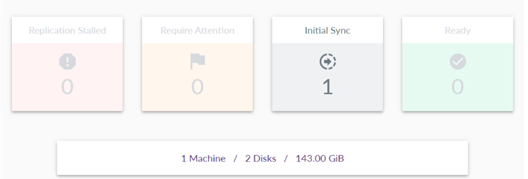
3. The ETA for initial data replication depends on the amount of the data to be transferred and the bandwidth
Setup Target Server configuration (CloudEndure Portal)
- Click on “Machines” > Select the source server > BLUEPRINT
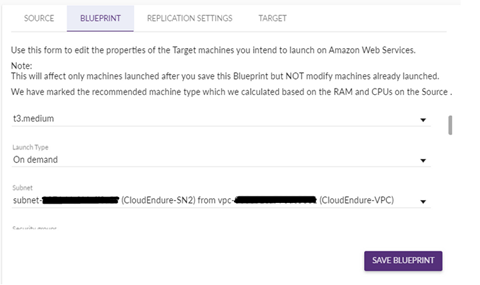
2. Select the following details:
-
- Instance Type:
- Launch Type: On-demand/Dedicated instance/Dedicated Host
- Subnet
- Security Group
- Private IP
- Elastic IP
- Public IP
- Placement Group
- IAM Role
- Use Existing instance ID
- Initial target instance state: – Started/Stopped
- tags
- Disks: – Choose Disk type & Disk IOPS
3. Save BLUEPRINT
Launch Target Server
Once the Initial data sync is completed, we can perform launch action. There are 2 types of Launch modes
-
- Test Mode: To test and verify that data is migrated successfully.
- CutOver Mode:
-
- Before you start the Cutover, open the User Console > Machines page. There, verify that each Source machine you want to cutover has the following status indications:
-
-
-
- DATA REPLICATION PROGRESS – Continuous Data Replication
- ETA | LAG – n/a | none
- STATUS – Target machine can be launched
- MIGRATION LIFE CYCLE – Ready for Testing/ Tested/ Cutover.
-
-
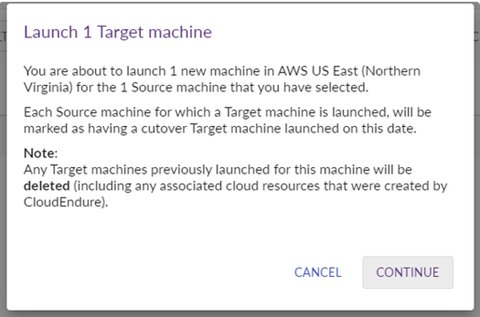
2. Click Launch target Machine and select Cutover
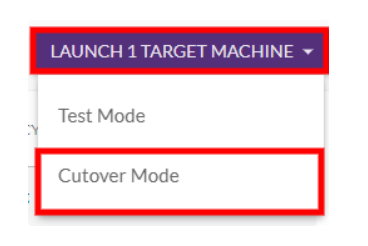
3. Click Continue
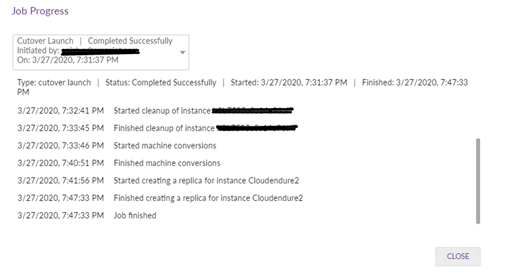
4. Check the Cutover progress on the Job Progress window
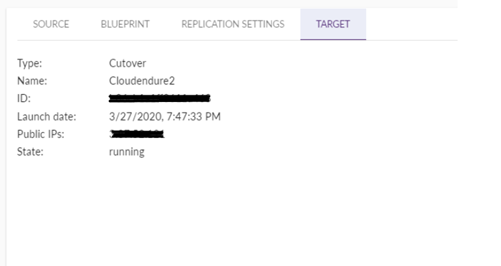
5. Once the job is finished, get the new server details from “Machines” > “Target”
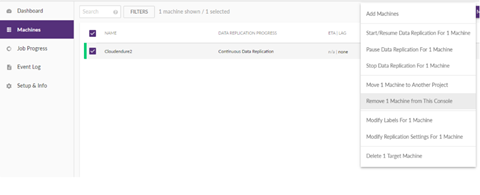
- Once the cutover/migration is finished remove the source server from the Migration project.
2. Click Continue
